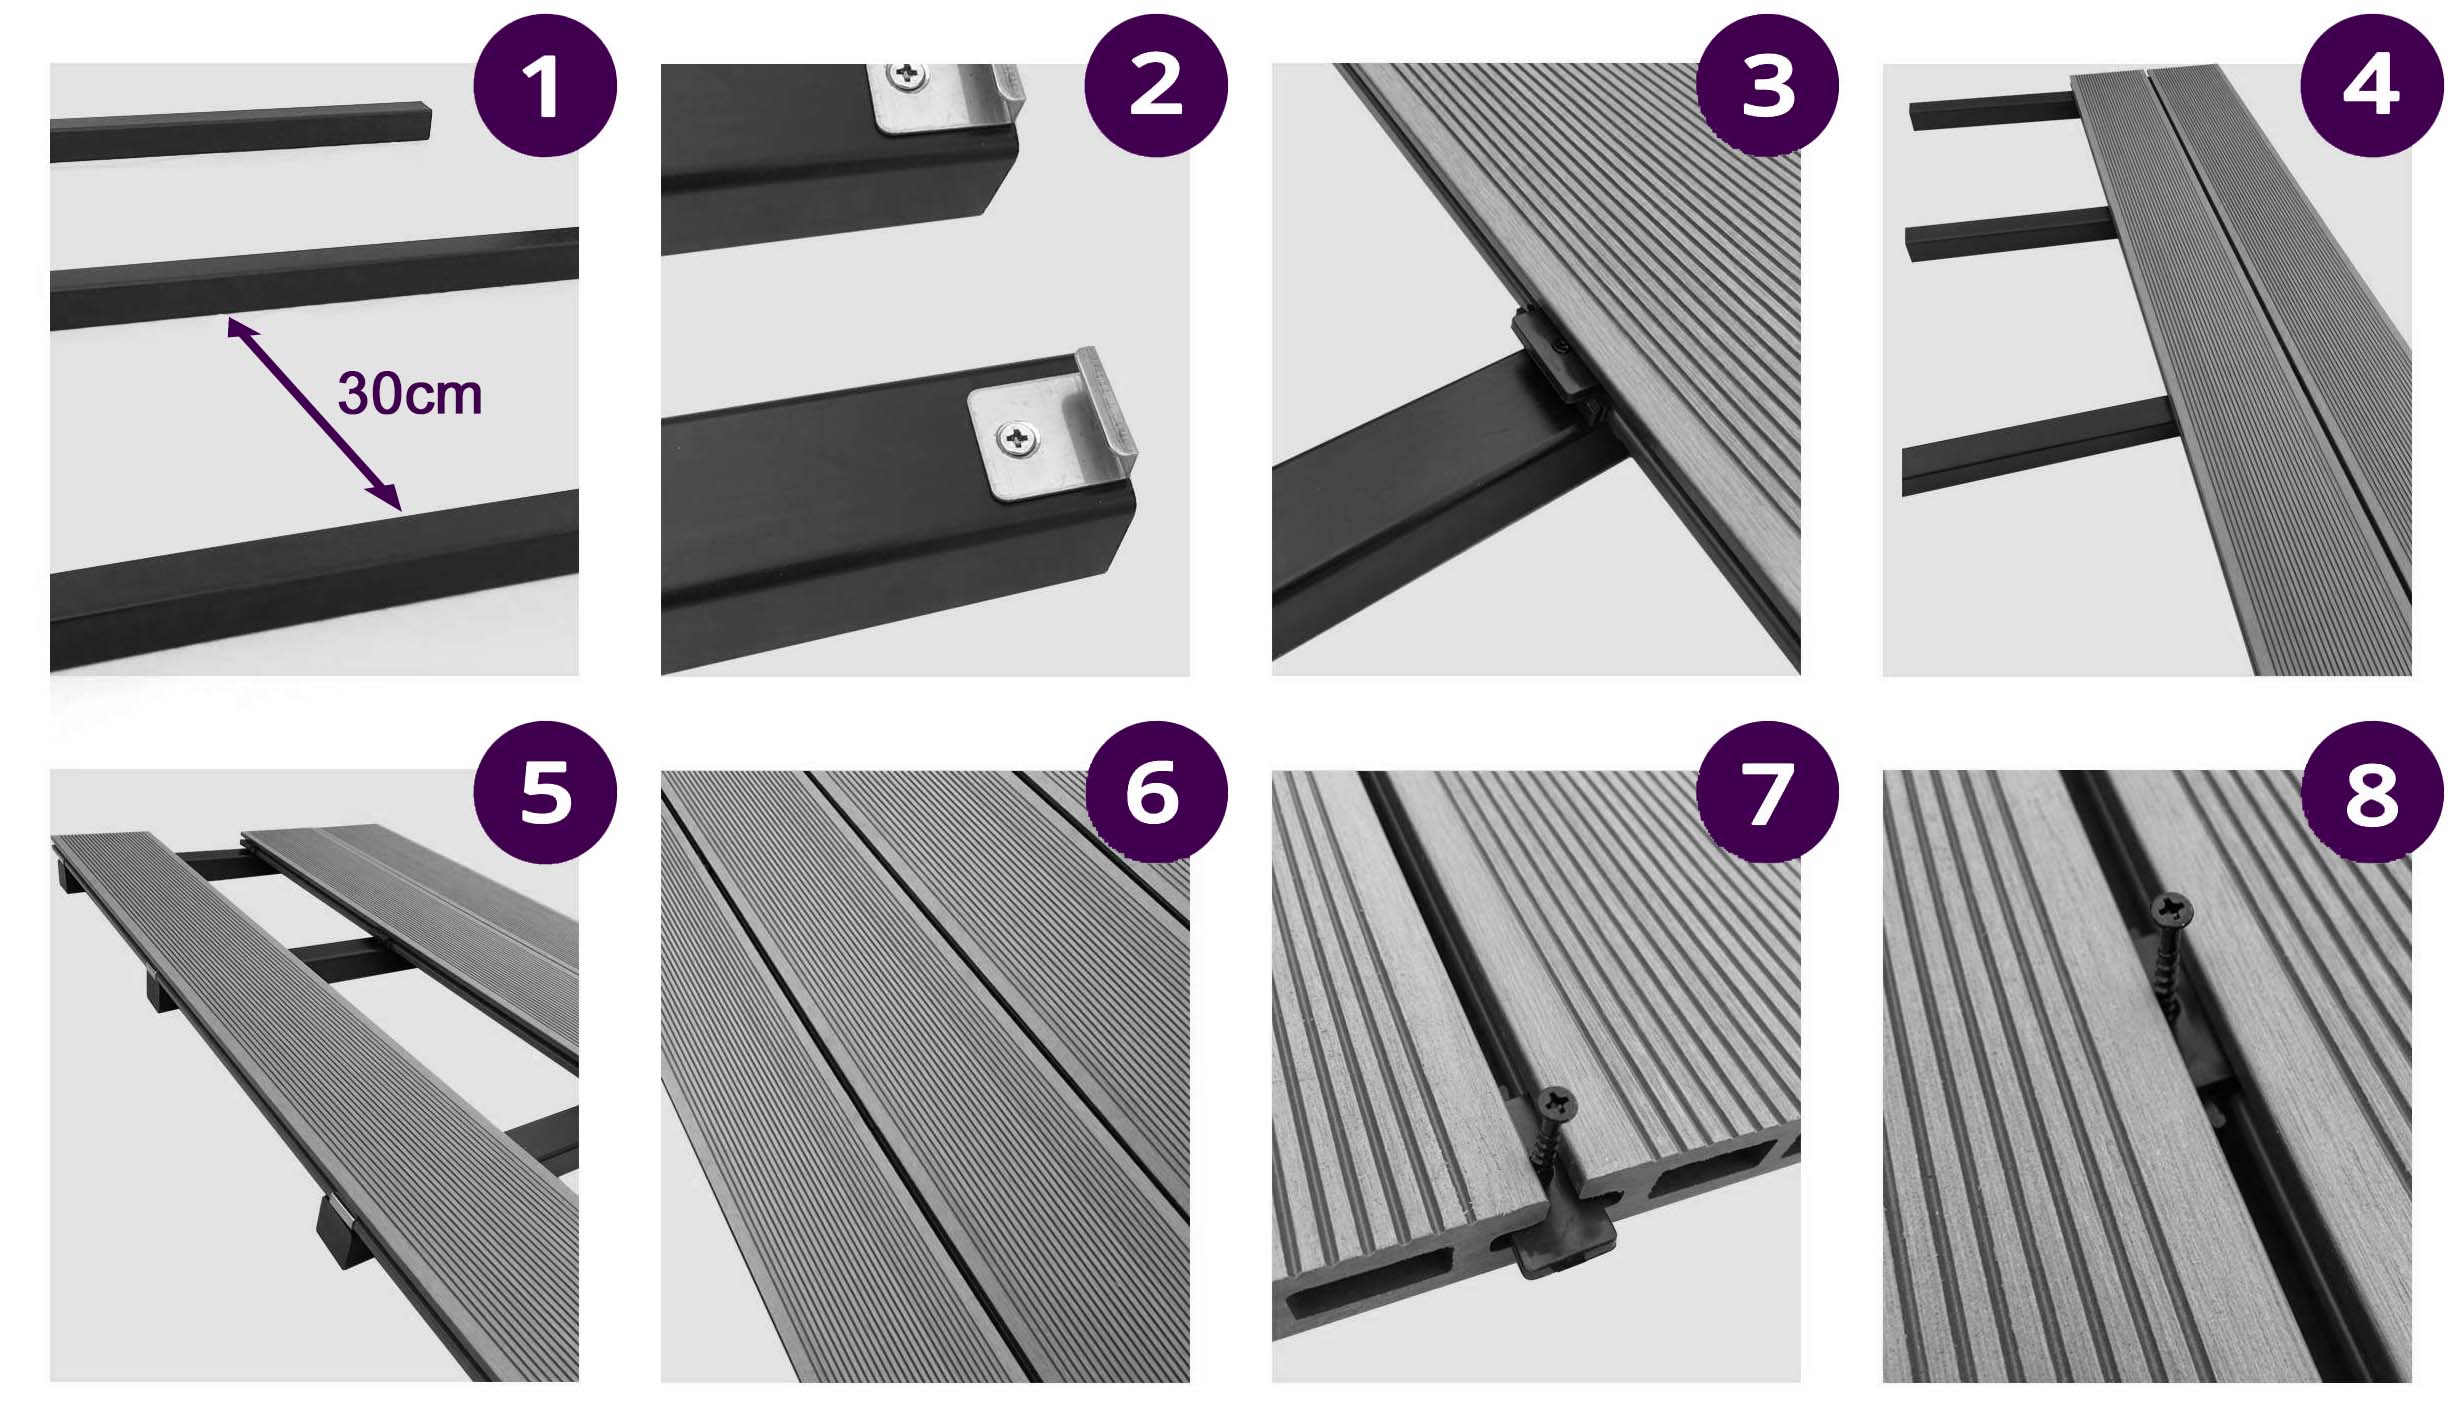
1. Lay the joists 30cm apart to create a substructure for the composite decking.
2. Screw the starter fasteners into each joist. We recommend pre-drilling holes to prevent the joists from cracking.
3. Slide the first decking board up to the starter fasteners and secure with hidden fasteners on the opposite side. Apply a fastener to each supporting joist. We recommend pre-drilling holes to prevent the joists from cracking.
4. Fit the next board by sliding it onto the hidden fasteners used to secure the previous board and fit another set of hidden fasteners to secure the opposite side of the board, again use one fastener for each supporting joist. Repeat until the second to last board.
5. Add starter fasteners to the end of the joists where the last board will comfortably fit. Leave space for the second to last board and add the end board.
6. Add the final (second to the end) board.
7. Slide hidden fasteners between the decking gap and align with each joist.
8. Screw the fasteners into the joists to secure the last two decking boards in place. The decking should now be finished.
Add fascia boards and edge trims for the perfect finish.

Notes
Butt joints should have a gap of a few millimeteres to allow the boards to expand and contract.
Butt joints should be supported by two lengths of joist, one for each decking board.
A fastener should be used at the end of each decking board, at a butt joint and not shared across two decking boards.
20mm should be left around the deck, next to solid structures.
Joist centres should be no more than 300mm.
The base should be solid such as concrete or hardcore.
The decking should slope at around 5mm per meter towards a drainage area to allow water to drain easily
Any composite product should not be directly screwed through, excluding joists.
Composite joists should be predrilled.


